Installation
There are several ways how to install or use Docker.
Windows
WSL is my favorit tool to run Docker in Windows machine.
Lima in MacOS
For using Docker in MacOS, I prefer to use Lima. It’s like WSL tool in MacOS.
Install lima using brew:
To create an instance “default” from a template “docker”:
1
|
limactl start --name=default template://docker
|
The command is structured as:
1
|
limactl start [--name=NAME] [--tty=false] <template://TEMPLATE>
|
To see template list:
1
|
limactl start --list-templates
|
To show the instance:
Stop the instance:
1
|
limactl stop [--force] <INSTANCE>
|
Docker/Lima Cheatsheet
Some syntax also apply to Lima by changing docker with lima nerdctl or nerdctl.lima
Docker elements
There are four important elements (or management command) in Docker:
- image
- container
- volume
- network
Common syntax
- list of the element run
docker <element> ls, e.g. docker volume ls
- To see list of image, beside
docker image ls, you can use docker images
- see help for using list command run
docker <element> ls --help, e.g. docker container ls --help
- clean up the element run
docker <element> prune, e.g. docker image prune
- see option flag for using prune
docker <element> prune --help, e.g. docker network prune --help
- remove the element
docker <element> rm <option if any> <element_name or id>
- see option for removing the element
docker <element> rm --help
- see option for list of the elements and others management commands and the command list
docker --help
- check command available in a management command, for instance
docker swarm --help
Delete Image
- Since
nerdctl doesn’t support prune, we can use
1
|
nerdctl.lima image rm $(nerdctl.lima image ls -q)
|
Stop Container
- Stop all container with Docker
1
|
docker kill $(docker ps -q)
|
- Stop all container with Lima
1
|
nerdctl.lima kill $(nerdctl.lima ps -a -q)
|
Remove Container
- To remove all container with Docker, we can use command
prune
1
|
docker container prune [OPTIONS]
|
- Alternatively, you can use:
1
|
docker rm $(docker ps -a -q)
|
1
|
nerdctl.lima rm $(nerdctl.lima ps -a -q)
|
Remove volume
1
|
nerdctl.lima volume rm $(nerdctl.lima volume ls -q)
|
Query and Filter
1
|
docker ps | awk '{print $3}'
|
- Show volume related to container
1
|
docker ps -a --no-trunc --format "{{.ID}}\t{{.Names}}\t{{.Mounts}}"
|
Creating Container
- Create nginx instance with Docker
1
|
docker run -d --name nginx -p 127.0.0.1:8080:80 nginx:alpine
|
or use Lima
1
|
lima nerdctl run -d --name nginx -p 127.0.0.1:8080:80 nginx:alpine
|
http://127.0.0.1:8080 is accessible from both macOS and Linux.
Other containers can be seen below
Redis Instance
Running with Docker
1
|
docker run --name some-redis -p 6379:6379 -d redis
|
Running with Lima
1
|
nerdctl.lima run --name test-redis -p 6379:6379 -d redis
|
For checking logs of the container, we can run this command:
1
|
nerdctl.lima container logs test-redis
|
MySQL Instance
1
2
3
|
lima nerdctl run --detach --name=mysql-container -p 52000:3306  \
  -e MYSQL_ROOT_PASSWORD=mypassword \
  mysql:5.7.38-debian
|
PostgreSQL Instance
Change lima nerdctl below with docker if you use Docker. Copy the lines to online notepad, change and copy again to your terminal.
1
2
3
4
5
6
|
lima nerdctl run -d --name=test-pg -p 52000:5432  \
  -e POSTGRES_DB=test_db \
  -e POSTGRES_USER=root \
  -e POSTGRES_PASSWORD=root \
  -v /tmp/lima/pgdata:/var/lib/postgresql \
  postgres:13.7
|
If you set POSTGRES_HOST_AUTH_METHOD=trust, then POSTGRES_PASSWORD is not required. My best practice, always set root for DB and user, POSTGRES_DB=root and POSTGRES_USER=root, in the first time and create custom user and database later. See my PostgreSQL article here.
Now let’s play around by entering container shell
1
|
nerdctl.lima exec -ti test-pg sh
|
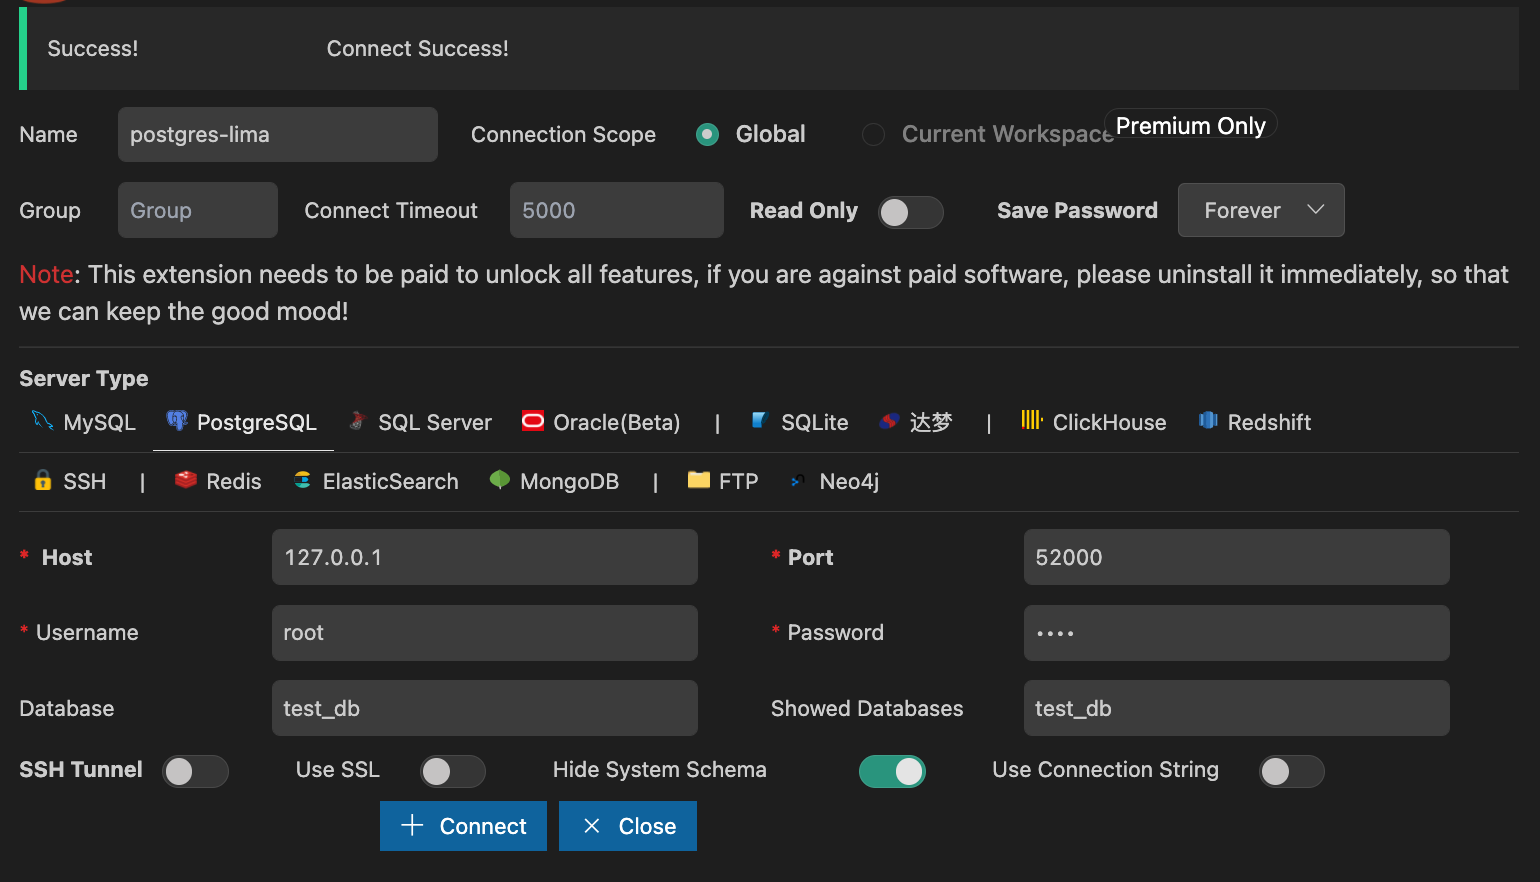
Then enter to psql compiler by typing psql. But, Ops, you should be get an error ‘database “root” does not exist’. Try to specify database - we’ve already created - that we want to connect.
And, Wola, you should be success to access psql compiler. Anyway, you also can check it by using VSCode database client.

pgAdmin Instance
1
2
3
4
|
docker run -d --name pgadmin_container -p 5050:80 \
  -e PGADMIN_DEFAULT_EMAIL=admin@admin.com \
  -e PGADMIN_DEFAULT_PASSWORD=root \
  dpage/pgadmin4
|
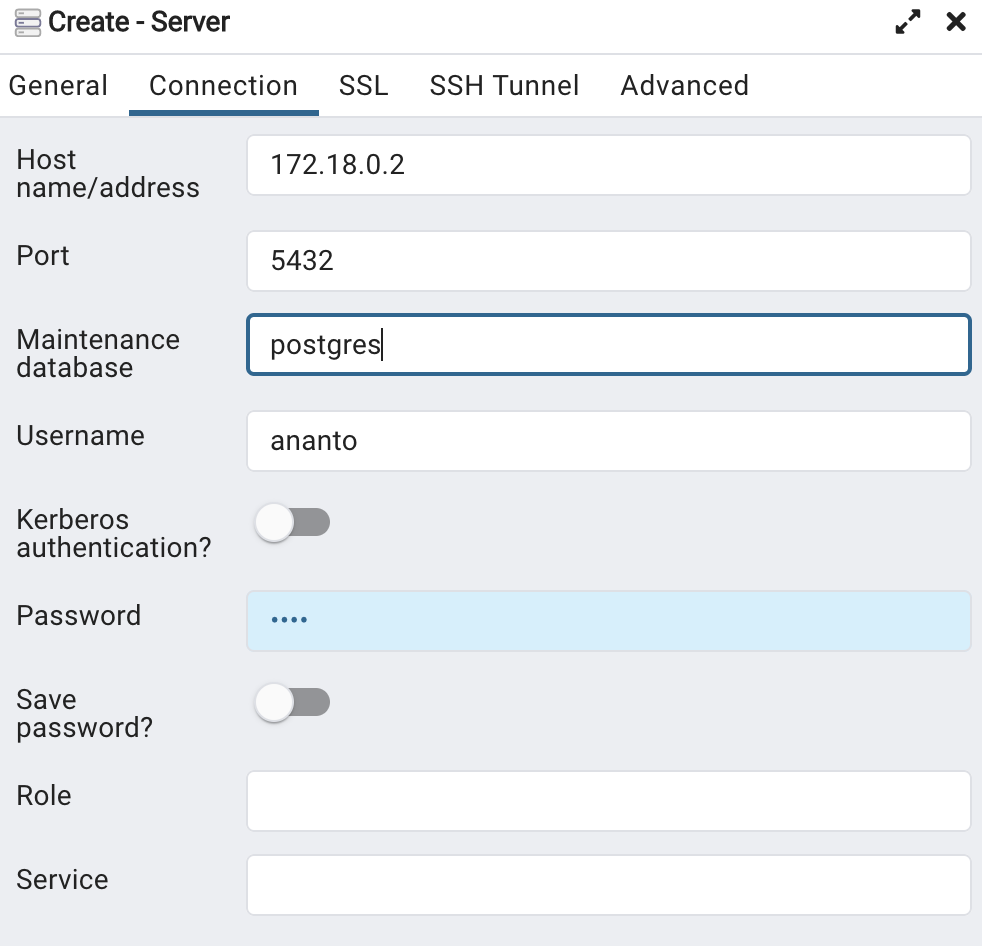
After running code above, you can open pgAdmin in your browser with address localhost:5050. To connect with existing PostgreSQL container, you should know what IPAddress of the container by running
1
|
docker inspect pg_container | grep IPAddress
|
And you’ll get result something like this
1
2
3
|
            "SecondaryIPAddresses": null,
            "IPAddress": "",
                    "IPAddress": "172.18.0.2",
|
Put the IPAddress value on the server configuration located in Object > Create > Server:

Stacks
Lima can use compose up feature like Docker or Podman. I write down some example stacks. Save codes in, for instance, stack.yml in the folder /tmp/lima then run
1
|
lima nerdctl compose up --file stack.yml
|
Stack Postgresql + Adminer
It is an example use compose to create Postgrs instance.
 1
 2
 3
 4
 5
 6
 7
 8
 9
10
11
12
13
14
15
16
|
# Use postgres/example user/password credentials
version: '3.1'

services:

  db:
    image: postgres
    restart: always
    environment:
      POSTGRES_PASSWORD: example

  adminer:
    image: adminer
    restart: always
    ports:
      - 8080:8080
|
Stack Postgre + pgAdmin
 1
 2
 3
 4
 5
 6
 7
 8
 9
10
11
12
13
14
15
16
17
18
19
20
21
22
23
|
version: '3.8'

services:

  db:
    container_name: pg_container
    image: postgres
    restart: always
    environment:
      POSTGRES_USER: root
      POSTGRES_PASSWORD: root
      POSTGRES_DB: test_db
    ports:
      - "5432:5432"
  pgadmin:
    container_name: pgadmin4_container
    image: dpage/pgadmin4
    restart: always
    environment:
      PGADMIN_DEFAULT_EMAIL: admin@admin.com
      PGADMIN_DEFAULT_PASSWORD: root
    ports:
      - "5050:80"
|
References:

