Installation
First thing first, install Ruby in your machine (see Ruby Cheatsheet). And check whether there is any rails installation already exist by running this
1
|
gem search '^rails$' --local
|
If rails doesn’t exist, install rails by using
1
|
gem install rails -v '6.1.6' -V --no-document
|
You can install another rails version available on remote server. Check the other versions with
1
|
gem search '^rails$' --all
|
Projects
To generate new project we can use this command
Rails generate new app with sqlite as default database. If we want to have project with postgresql database, use rails new appname -d postgresql or rails new appname -d mysql. These are requiered Gem pg or mysql2 for mysql database.
You also can generate specific rails version that have already installed before
1
|
rails _5.2.4.1_ new app_name
|
Here I write some sample project apps to make us familiar with the syntax
TODOO Application
Generate Scaffolding
Here we’ll learn about how to generate simple CRUD application using rails g, using console rails c, create and migrate database using rails db:create and rails db:migrate and play with simple route and form validation.
- Generate new project
rails new todoo
- Move to the project folder
cd todoo and run local server rails s. Check the web browser http://localhost:3000/ and you must see rails-welcome screen. If you get an error, it might be database error. Let’s create database in the next step.
- If you have not yet created the project database, you can create using rails command
rails db:create
- Generate your first resource called todo
rails g scaffold Todo title task:text
- Migrate the resources to your database table using
rails db:migrate
- You also can rollback your migration by using
rails db:rollback. Don’t forget to migrate again.
- Rails automatically creates routing for ‘Todo’ resource. To see what routes available run
rails routes
- Routing investigation also can be done by console. Run
rails c and type Rails.application.routes.recognize_path("/todos") then you will get this
1
2
|
irb(main):001:0> Rails.application.routes.recognize_path("/todos")
=> {:controller=>"todos", :action=>"index"}
|
- The result above means that path /todos are handled by TodosController in file app/controllers/todos_controller.rb with index action. In the file you can see there are seven action available, i.e. index, show, new, edit, create, update, and destroy
- Still in the console, you also can check home route by using
Rails.application.routes.recognize_path("/")
- Now try to edit file ‘config/routes.rb’, we add a line to handle homepage with ’todos#index’ controller
1
2
3
4
5
|
Rails.application.routes.draw do
  root to: "todos#index"
  resources :todos
  # For details on the DSL available within this file, see https://guides.rubyonrails.org/routing.html
end
|
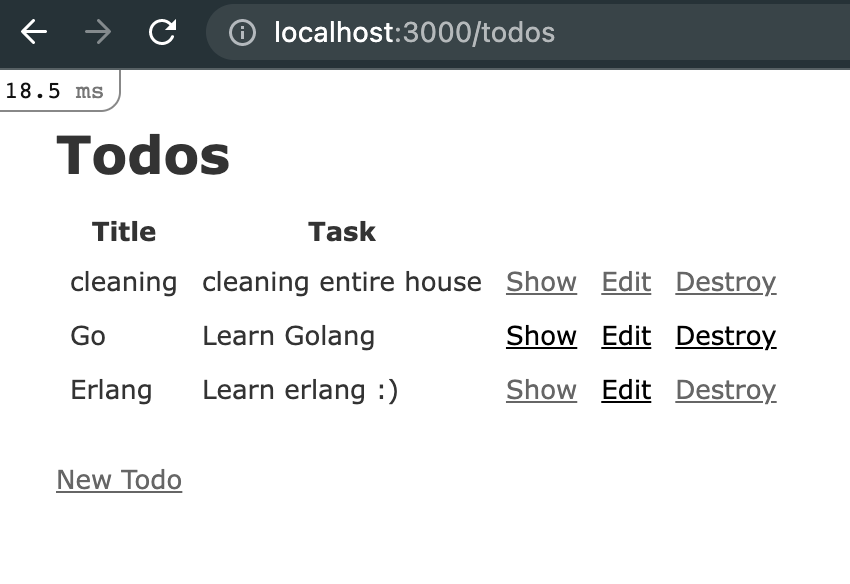
- Try to re-run again, open web browser and access http://localhost:3000/. Now instead you have rails welcome screen, you get index todo page.
- Play around with simple todo app from web browser. Try add some data.

- From console
rails c, you can also view the record using command Todo.all for all record, Todo.first for first record, or for more specific result, use Todo.last.task for the task field in the last record.
- You also can create new record from console. i.e.
Todo.create(title:"Elixir",task:"Learn Elixir...") or update the existing record, i.e. Todo.first.update(title:"Clean")
- How if there is anyone put title only without provide task input. Is it still valid?. Then you can check it from the console. Initialize c variable
c = Todo.new(title:"c") then run c.valid?. Then it should print true
- To avoid the problem, we should put validation in app/models/todo.rb
1
2
3
4
|
class Todo < ApplicationRecord
  validates :title, presence: true
  validates :task, presence: true
end
|
- Reload the console using
reload! and try again as step 16 state. Now you should get false
Layout
- Adding Bootstrap into the Gemfile
1
2
3
4
|
gem 'bootstrap', '~> 5.1.3'
gem 'bootstrap-icons', '~> 1.0', '>= 1.0.12'
gem 'bootstrap-icons-helper'
...
|
- Running bundle install to download the new dependencies
bundle install
- Rename app/assets/stylesheets/application.css to app/assets/stylesheets/application.scss
- Then add the lines in the file
 1
 2
 3
 4
 5
 6
 7
 8
 9
10
11
12
13
14
15
16
17
18
19
20
21
22
23
24
25
26
|
@import "bootstrap";

main.container {
    width: auto;
    max-width: 680px;
    padding: 0 15px;
    padding-bottom: 60px;
 }

 footer {
    position: fixed;
    bottom: 0;
    width: 100%;
    height: 60px;
    line-height: 60px;
    background-color: #f5f5f5;
    text-align: center;
 }

 .media p {
    font-size: 16px;
 }

 a:hover {
    background: #f5f5f5;
 }
|
- In app/views/layouts/application.html.erb add these lines to create footer and wrap yield which will render a specific view template.
 1
 2
 3
 4
 5
 6
 7
 8
 9
10
11
12
13
14
15
16
17
18
|
<!DOCTYPE html>
<html>
  ...

  <body>
    <main role="main" class="container">
      <%= yield %>
    </main>

    <footer class="footer">
      <div class="container">
        <span class="text-muted">
          Todoo by Ananto
        </span>
      </div>
    </footer>
  </body>
</html>
|
- Put our own style to file app/views/todos/index.html.erb
 1
 2
 3
 4
 5
 6
 7
 8
 9
10
11
12
13
14
15
16
17
18
19
20
21
22
23
24
25
26
27
28
29
30
31
32
|
<p id="notice"><%= notice %></p>
<br/>
  <% @todos.each do |todo| %>
      <div class="d-flex">
        <div class="flex-shrink-0">
          <img src="<%= gravatarized_url(todo.title) %>" class="align-self-start mr-3">
        </div>
        <div class="flex-grow-1 ms-3">
          <h5><%= todo.title %></h5>
          <%= todo.task %>
        </div>
        <div class="flex-shrink-0">
          <span>
            <%= link_to todo,  class: 'btn btn-primary btn-sm' do %>
               <%= bootstrap_icon "eye", width: 16, height: 16, fill: "white" %>
            <% end %>
          </span>
          <span>
            <%= link_to edit_todo_path(todo),  class: 'btn btn-primary btn-sm' do %>
              <%= bootstrap_icon "pencil-square", width: 16, height: 16, fill: "white" %>
            <% end %>
          </span>
          <span>
            <%= link_to todo, method: :delete, data: { confirm: 'Are you sure?' }, class: 'btn btn-primary btn-sm' do %>
               <%= bootstrap_icon "trash", width: 16, height: 16, fill: "white" %>
            <% end %>
          </span>
        </div>
      </div>
    <br/>
  <% end %>
<%= link_to 'New Todo', new_todo_path %>
|
- Define gravatarized_url inside TodosHelper in file app/helpers/todos_helper.rb
1
2
3
4
5
6
|
module TodosHelper
    def gravatarized_url(title)
        hash = Digest::MD5.hexdigest(title)
        "https://www.gravatar.com/avatar/#{hash}?d=wavatar"
    end
end
|
- Check your page now. It’s cool. But for better user experience, let’s render the form on the index page.
Add the following code into todo/index.html.erb
1
2
3
4
5
6
7
8
|
<p id="notice"><%= notice %></p>

<%= render("form", todo: Todo.new) %>

<br/>
  <% @todos.each  do |todo| %>
      <div class="d-flex">
...
|
- Replace the content of todos/_form.html.erb with the following codes:
 1
 2
 3
 4
 5
 6
 7
 8
 9
10
11
12
13
14
15
16
17
18
19
20
21
22
23
24
25
26
27
28
29
|
<div class="card">
  <div class="card-body">
    <h5 class="card-title">Create A Task!</h5>

    <%= form_with(model: todo) do |form| %>
      <% if todo.errors.any? %>
        <div id="error_explanation">
          <h2><%= pluralize(todo.errors.count, "error") %> prohibited this todo from being saved:</h2>
          <ul>
            <% todo.errors.each do |error| %>
              <li><%= error.full_message %></li>
            <% end %>
          </ul>
        </div>
      <% end %>
      <div class="form-group mb-3">
        <%= form.text_field :title, placeholder: "Title", class: "form-control" %>
      </div>

      <div class="form-group mb-3">
         <%= form.text_area :task, placeholder: "Task", class: "form-control" %>
      </div>

      <div class="actions">
        <%= form.submit "Add!", class: "btn btn-outline-primary w-100" %>
      </div>
    <% end %>
  </div>
</div>
|
- We also want to improve user experience after he add task. Instead redirect to other page, we want to user stay on the index page and see the task he recently added on the top list.
edit TodosController#create
1
2
3
4
5
6
|
def create
  @todo = Todo.new(todo_params)

  respond_to do |format|
    if @todo.save
      format.html { redirect_to root_path, notice: "Todo was successfully created." }
|
also change TodosController#index
1
2
3
|
def index
  @todos = Todo.all.order(created_at: :desc)
end
|
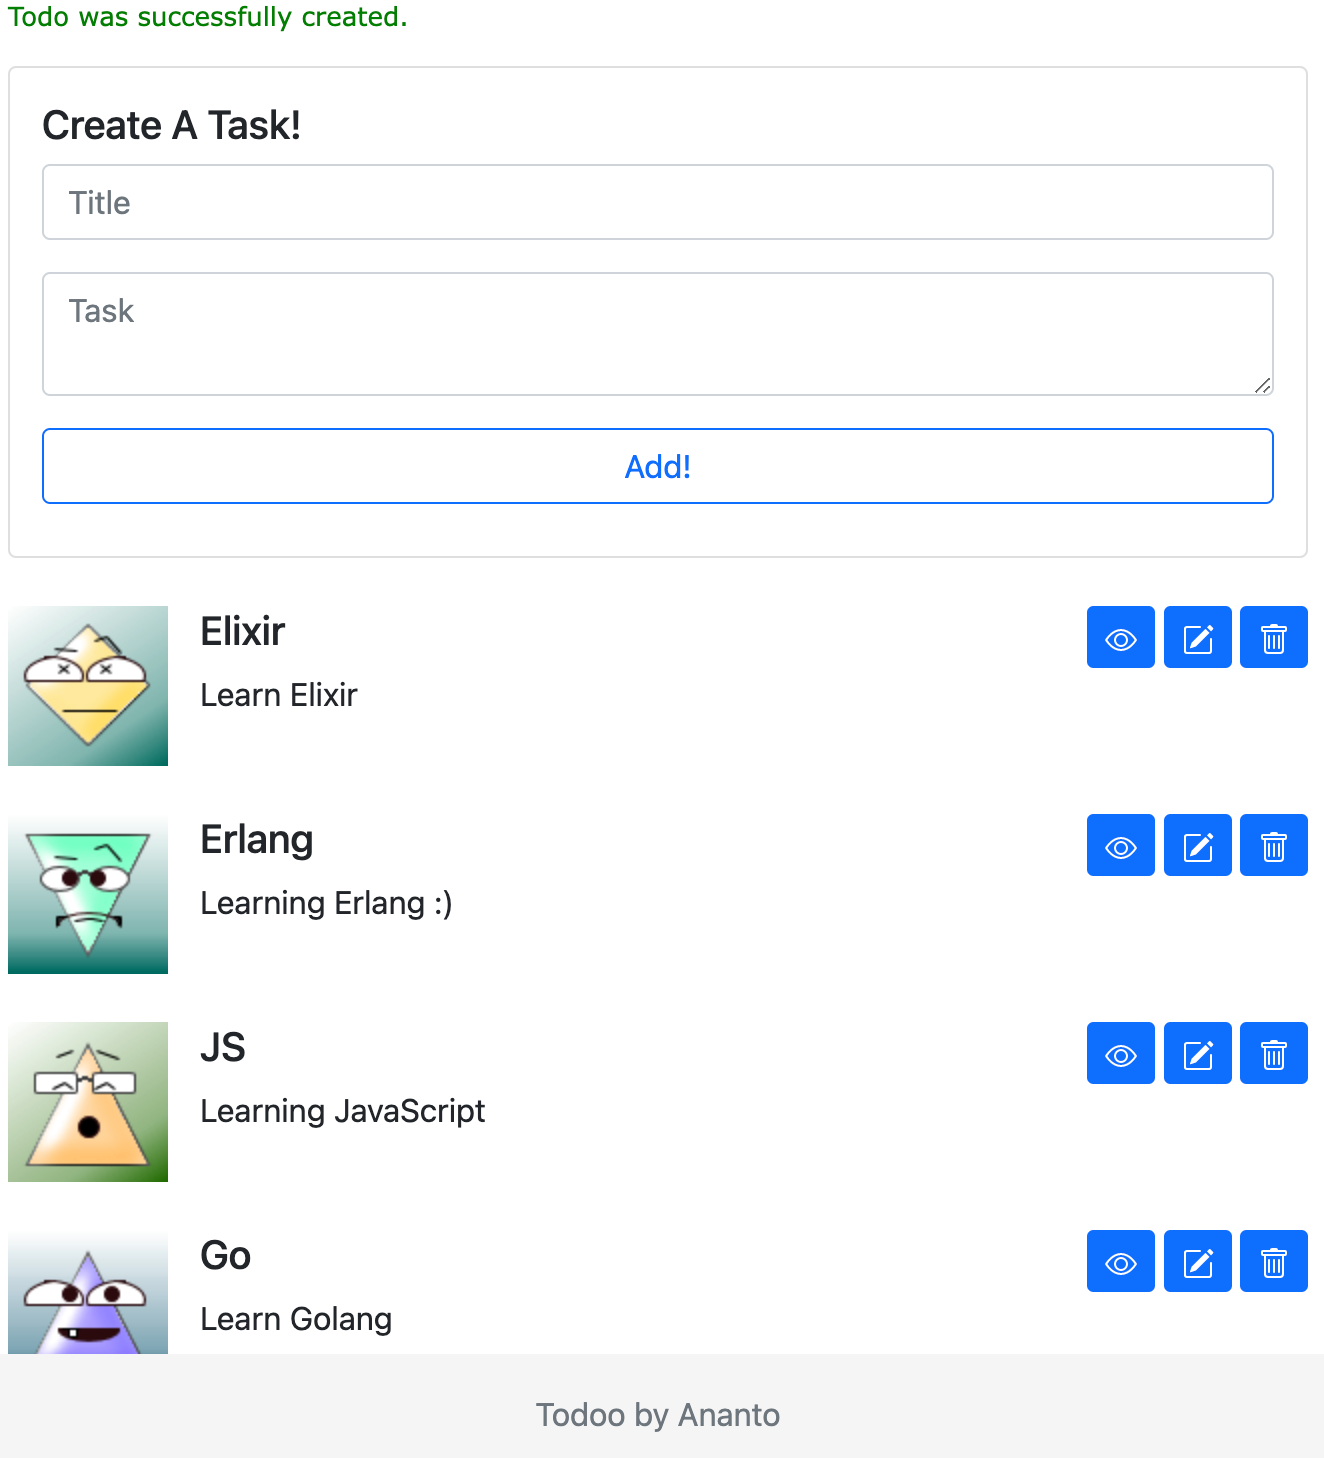
- Ta Da.. Here the final view of our Todoo application

Another Application
References:

